At the end of Part 1 we’d got the game installed, bought a new plane and set off into battle with the helpful advice of “point yourself in the vague direction of the enemy and hope.” That’s surely a complete and comprehensive strategic and tactical guide to air combat, isn’t it? No? Oh. Well. All right.
There are two Arcade PvP mission types in War Thunder (at the time of writing, subject to change over the course of the beta etc.): Ground Strike and Domination.
Ground Strike
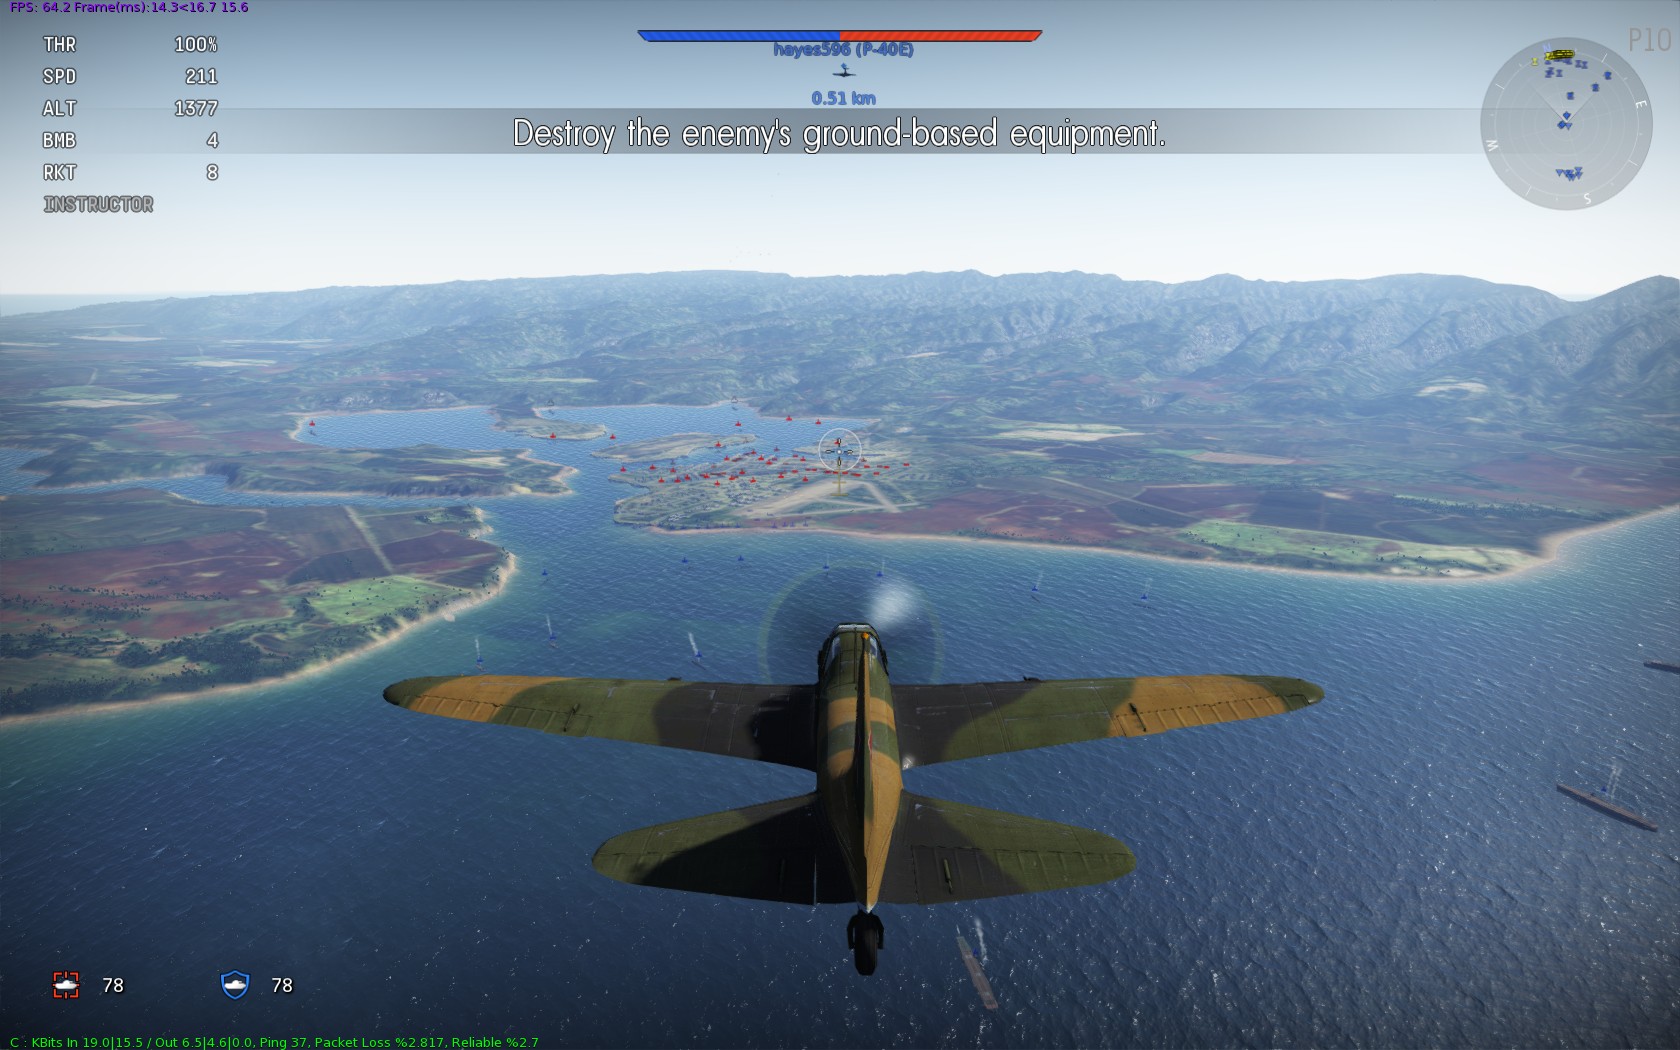
The start of a Ground Strike mission. Look at all the lovely red dots to attack!
A mode called “Ground Strike” suggests that the objective is to strike the ground as hard as possible with your plane. Turns out that’s not the case, although there’ll probably be a fair amount of crashing going on anyway. The objective is actually to destroy all of the enemy ground units before they destroy all of yours, or to shoot down all enemy aircraft. If there are airfields on the map then destroying the enemy airfield is another way of winning. This requires dropping a lot of very heavy bombs on the enemy runway, I’ve never seen a team successfully manage it in lower rank fights, but it’s something to watch out for once the heavier bombers start appearing.
In the early Rank 0/1 battles, when most people are in biplanes with a couple of machine guns and everyone’s keen to dogfight, it’s fairly common for everybody to pile in to a big furball in the middle of the map and keep flying around in circles until one side has been entirely shot down. As attack aircraft and bombers start arriving (and people expand their hangers) the ground targets really become the focus, it’s much more unusual for a higher rank battle to come down to the last team flying. (Update: patch 1.31 introduced two new Ground Strike maps for Rank 0/1/2 battles that are very compact, and finish very quickly if a team concentrates on attacking ground targets.)
Even without any bombs or rockets you can still have a crack at ground targets in a biplane with a couple of popguns; Artillery and Anti-Aircraft Guns (either mobile or fixed) are soft targets (though careful of the latter, they shoot back); Armoured Cars are vulnerable to machine gun strafing, but take a few more shots; Light, Medium and Heavy Tanks and Pillboxes are tougher and need progressively larger cannons, rockets or bombs. Basic technique should be pretty obvious, point nose of plane towards thing on ground, shoot it with guns, then (and this is the important bit) pull up before you crash.

Strafing a tank
I like to fly with mouse aim and W and S as pitch down and pull up respectively, so mashing ‘S’ as you get near the ground can just give a bit of a helping hand, especially in some of the more lumbering planes that take a bit longer to respond to your mouse wiggling. You can always re-run the tutorials or have a go at some single player missions if you want a bit of practise without 15 maniacs trying to shoot you down.
Speaking of the other maniacs, before commencing a strafing run it’s worth checking around for no enemy fighters poised to pounce; look out for red dots on the mini-map, and hold down ‘C’ for a visual check about the place. Though you can’t exactly be stealthy in an aeroplane, you can check where everyone is on the map (‘M’) if you want to head off and find some undefended ground targets, but be careful as you get near the opponents spawn point as newly appearing fighters can really put a crimp on your day.
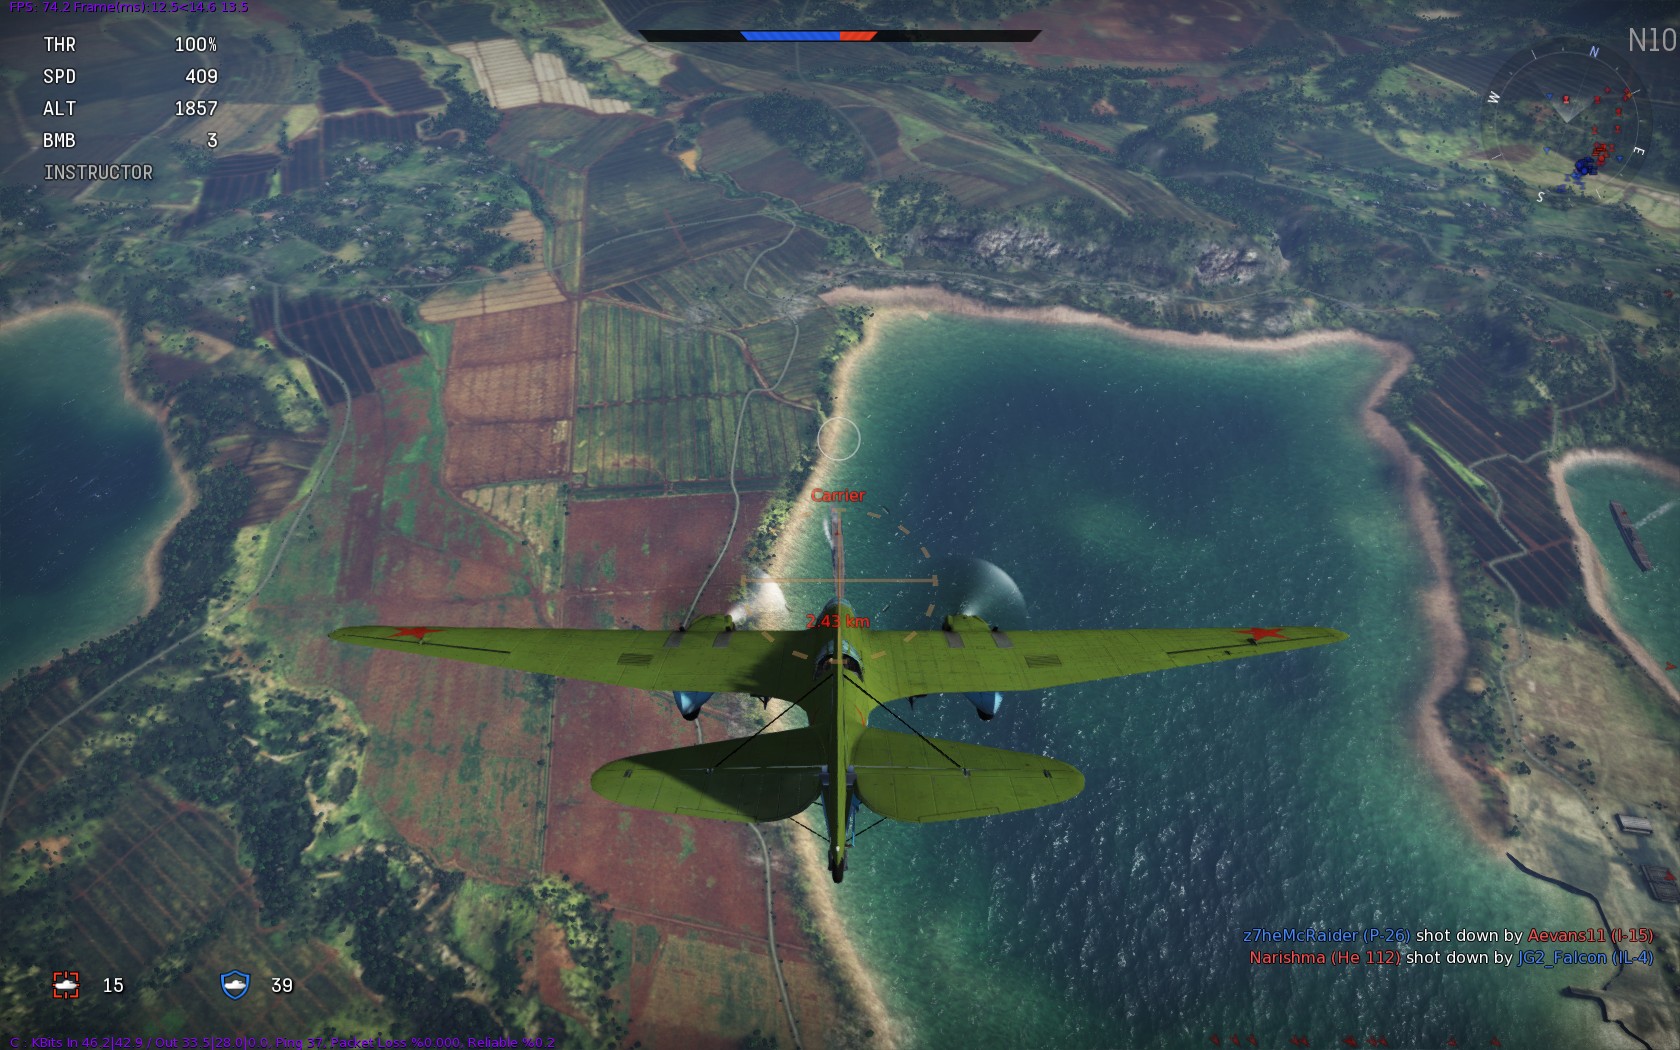
Carri ‘er? I hardly know ‘er!
Domination
The other main mode is Domination, in which the goal is to capture airfields. So a bit like Capture the Flag, but with airfields instead of flags. Except you don’t have to bring the enemy airfield back to your airfield, you just hold onto it, so it’s territorial domination. Probably why they called it ‘Domination’, in hindsight.

A Domination map with three airfields (A, B and C)
On a Domination map there are one, two or three airfields, and the aim is to be holding more than the enemy, which causes their red bar to go down. If they hold more than you, your blue bar goes down. Once one bar reaches zero, the other team wins. (Update: patch 1.31 tweaked the mechanics slightly so that simply holding an airfield causes the enemy bar to go down, so if both teams hold one airfield, both bars go down.) So that bombers aren’t entirely useless there are also some ground or naval units on Domination maps, and destroying them also takes a chunk off the enemy score bar; destroying all the targets won’t win the round, but it can give you an edge.
What the game doesn’t seem to mention is how to capture an airfield, and it turns out that you have to land on the runway. There is a landing tutorial available, under “Game Modes” on the main screen, that teaches you to land safely: very carefully banking around, gradually losing altitude, gently reducing the throttle, lowering landing gear and gracefully touching down. You don’t want to do that in a Domination match; you’re trying to get to the airfield and capture it as quickly as possible, so max the engine and point at the ground, full speed ahead! Except of course you have to be going slowly to land, so then cut your engine completely, hit ‘G’ to extend landing gear (if it’s not fixed) and ‘F’ for flaps and pull a load of violent turns to dump speed as quickly as possible as you get near the ground. Needless to say this can get a bit tricky; all airfields start neutral, typically there’ll be one by each spawn point, so it’s not uncommon for a Domination match to start off with a bunch of people on each side going straight for the capture and an airfield littered with the burning wrecks of planes that misjudged their approach (or got in each others way and collided in mid-air). You might want to leave it to others to actually capture the airfield to start with, though there are nice XP and cash rewards for doing so, so give it a crack if you’re feeling confident.
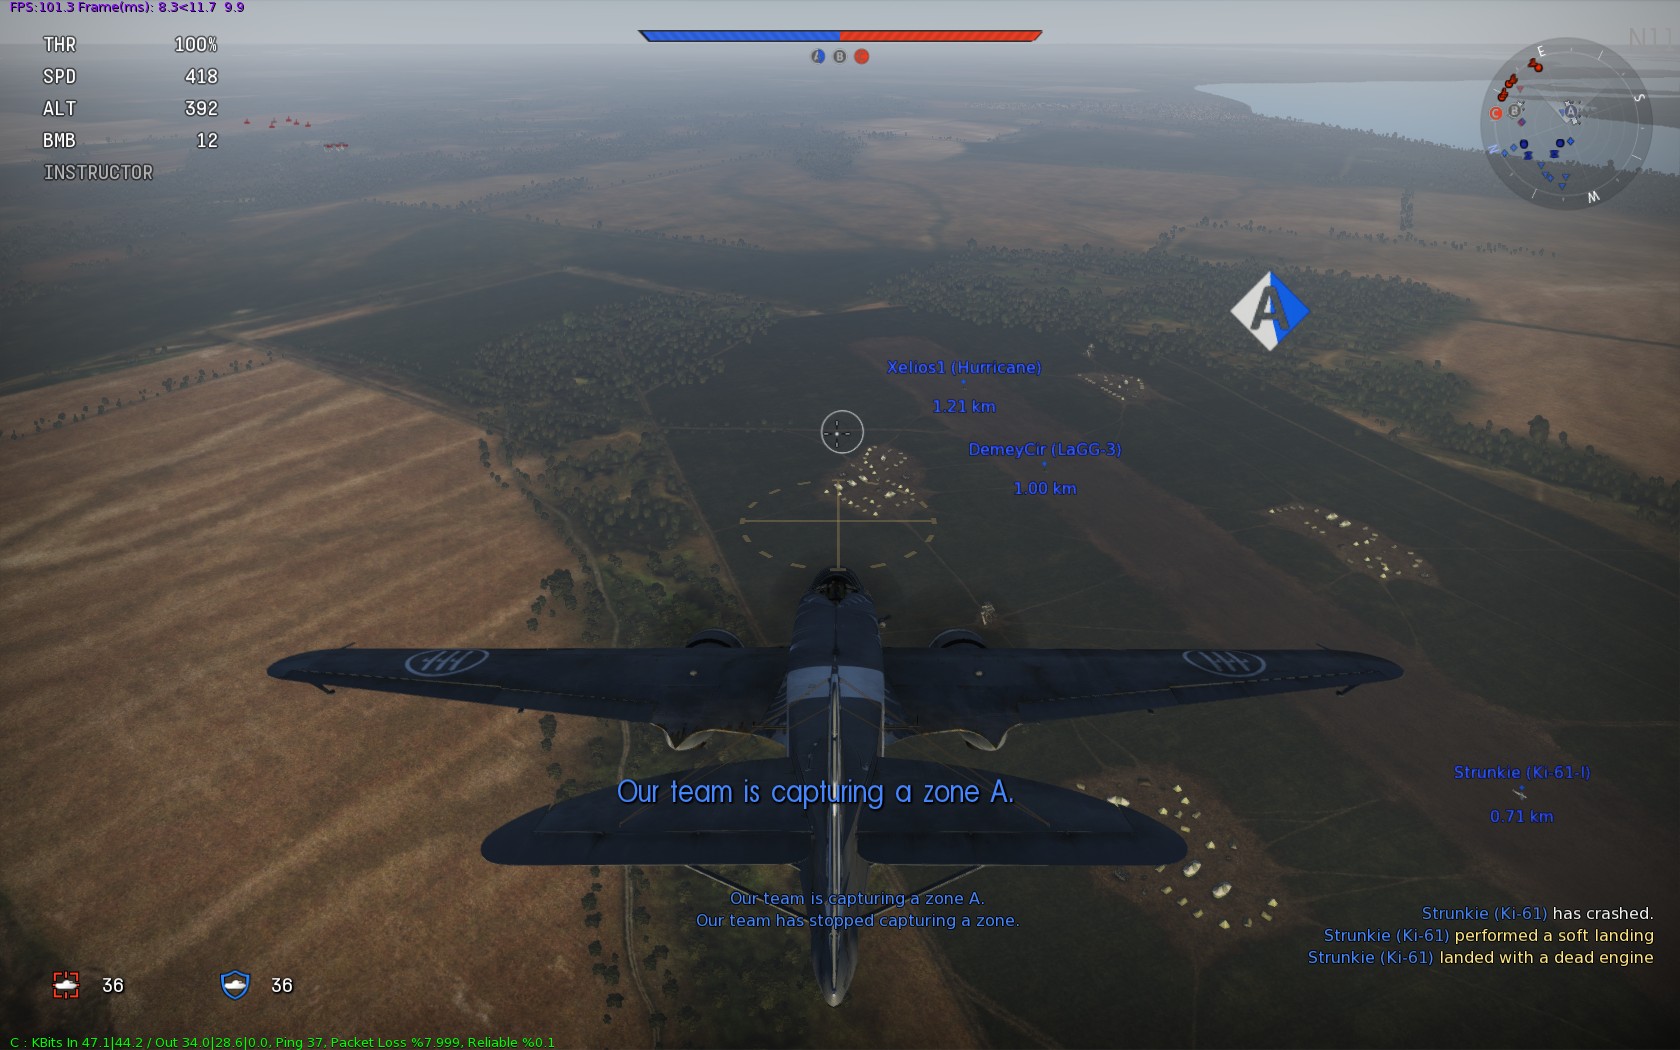
Our team capture airfield A as I offer moral support and resist the temptation to drop bombs
I say you have to ‘land’ on the runway, technically you just need to have your wheels in contact with the ground, you don’t actually have to come to a standstill, so once the control point turns blue you can whack the throttle back up and take back off again to get into action. It also means you don’t have to bring your speed right down as you would for actually landing, but the faster you’re going the more risk that a slight twitch will result in a crash of flaming death; swings and roundabouts… If, in the process of landing, you clip your propeller on the ground it’s not always fatal, though obviously you’re not going to be flying anywhere. Fortunately landing at an airfield repairs your aircraft (and you get an XP bonus for landing with a dead engine, even if it was self inflicted), so as long as you weren’t going so quickly that you head off the end of the runway into a hanger building or inconvenient tree you might be able to gently brake, come to a stop, then get back into action once the repair timer has counted down.
You ought to be doing one of two things on a Domination map: defending a friendly airfield or trying to capture an enemy airfield. Defending is probably the easiest, especially if you’re not too confident on landings, just hang around a blue airfield and shoot down anything red trying to land. As a landing plane has to fly slow and straight they’re pretty good targets; if you gain a bit of altitude and loiter a little way away the enemy might be so fixated on landing they don’t even notice you until it’s too late, but don’t loiter so far that you can’t make it back in time to stop them. If you’re on your own and there are multiple incoming bandits you can try and get a bit of help via the voice commands (‘T’ and then a number; ‘Defend the base!’ or ‘Cover me!’ are worth a shot, but don’t hold your breath). If you’re going to try and capture the enemy airfield, you really need to shoot down any defenders first; if you’re lucky there might be a big old dogfight going on in the middle of the map, allowing you to sneak around a map edge to an undefended airfield, but if there are any opponents in the area it’s probably not worth trying to land unless you’re really confident of your damage absorption powers.
If you end up in a bomber, either by choice or from a lack of alternatives left in the hanger, then you can always have a crack at ground targets. On a map like Stalingrad: Winter, though, the 30 vehicles on each side tend to be wiped out in fairly short order, leaving you lumbering around with poor air-to-air armament feeling a bit of a gooseberry. Fear not, though, in some ways you’re the ultimate airfield defender. An enemy aircraft has to land, after all, or at least get its wheels on the deck, and you have… bombs! You can’t destroy your own airfield in a Domination match, so line ’em up, and as the enemy aircraft touches down thinking “ha, that bomber will never be able to stop me with its pathetic turret guns”, bombs away! You need to be at low altitude (or to have incredible skill at judging bomb drop time to account for the speed of the enemy plane); the bigger the bomb the less precise you need to be. I have to admit to giggling slightly on the few occasions I have managed to catch someone out like that.
General Air Combat
Of course regardless of the game mode there are a bunch of enemy aircraft trying to stop your team doing what it’s trying to do, which might be trying to stop their team doing what it’s trying to do, which all gets very circular. Anyway, you’ll end up shooting at aeroplanes at some point. There’s masses of literature already devoted to air combat, both real life and simulated so I won’t spend too much time on Thach Weaves, Immelman Turns, boom and zoom, turn n’ burn, salt n’ shake, Chaka Demus n’ Pliers and the like; Boelcke’s rules from 1916 aren’t a bad starting point, there’s a War Thunder Wiki with some useful articles, or plenty on YouTube like Bis18marck70’s channel.
One thing to watch out for is overheating guns. As you fire, a red circle fills around your gunsight; this represents your guns heating up. The longer you fire the greater the chance of a jam; you might well have seen a ‘Gun Jammed’ message, which confused me to start with as my guns still seemed to be working. As I understand it, a ‘jam’ in War Thunder actually knocks a chunk off your ammunition supply. Whilst not a disaster, with machine gun ammunition resupplying after a short delay (cannon take a bit longer), firing in short bursts is generally a better idea than holding the trigger down, unless you really need to bring something down in a hurry, like an aircraft about to land on your airfield in Domination.
Speaking of really needing to bring an aircraft down, there is a last resort: ramming. Rather a divisive subject, liable to cause outbursts of anger in the chat window, but there is precedent and it’s undeniably effective if someone is about to capture your airfield, or is lining up to bomb the last friendly ground target. Many ramming incidents happen during head-on attacks, and if you’re playing a game of chicken then you’re at least as much to blame as the other person if you do crash. If you really like your plane you should take early evasive action in such a situation; if I’m in a shiny new high rank fighter I’ll break off and circle around for another shot, if I’m in something of a lower rank that’s suffered some damage, heck, I’ll keep the fire button held down, and if the other guy doesn’t turn that’s his problem… There’s always a risk of accidental collisions and friendly fire too, especially if there are three or four people chasing the same opponent, or if one person is performing a daring low-level strafing attack on a target that a high-altitude bomber is attacking; these things happen, it’s best not to get too worked up about it, but do be careful, even if just to avoid the cash and XP penalty from downing a friendly.
That should get you progressing through the ranks of your air force, we’ll continue in Part 3 with a few tips on aircraft and upgrades.